What I have to do to get the dimensions of the real planes right
Not long ago, I was asked by one flight sim enthusiast, how I was able to get the real dimensions of the aircraft parts when modelling these jets. I thought it was a great question, and since I am the one who creates all the models and textures here at X-Crafts, I’d like to give you a glimpse of what it takes to create these models, and the time required to get it right.
Reading time: 5 minutes
If you don't have 5 minutes, scroll right down until you see a video thumbnail!
The tricky thing about modelling an entire aircraft is that all parts of it have to fit perfectly. I guess you could think about it as building a LEGO Death Star containing 10 000 LEGO pieces, but each individual LEGO piece has a completely unique shape, and nobody gave you the instructions. The only thing you have is a picture of the completed Death Star on the box. Welcome to my world!
A good starting point is to get the general dimensions, which are usually available online. Those would be the big dimensions like the length of the aircraft, wingspan, fuselage width, tail height, etc. I happen to have two pages of the Airport Planning Manual with these dimensions hanging on my wall, because it represents the starting point of each project, and at this point, it really defines my life!

Once you have some of the main dimensions, you can use the blueprints (which unfortunately are not always accurate either) to measure, calculate and deduce the unknown dimensions. The real challenges arise when I get under the hood of the plane, inside the cockpit or the cabin, or even when things start moving.
When I started working on the E195 v1.0 about seven years ago, I had to simply eyeball a lot of it. It is nearly impossible to find the interior dimensions, and since I didn’t know any real E-Jet pilots back then to help provide images and real-life dimensions, I had to rely on the pictures available online as visual references.
That is common practice when modelling, and it wouldn’t be too much of an issue for one LEGO piece. But remember, we have 10 000 of them. So once you start eyeballing things, you will sooner or later find out that it won’t fit in with the rest of the pieces, and you won’t know which one of them is wrong, if not all of them!
Luckily today I have a significant group of real E-Jet pilots, and I am able to ask them directly to measure things for me or to send me very specific pictures.
I’d like to use one real-life example. When I was working on the main landing gear for the new E175, I had dozens of pictures of the gear from all directions and angles. I finished modelling the whole gear and all seemed fine… until I tried to retract the gear into the belly.
The gear was one LEGO piece, the wing was another and the belly was the third piece. They all needed to fit, but when I modeled the gear well holes in the bottom of the belly, based on the blueprints, the gear would cut right through the solid side of the belly, instead of retracting directly into the gear well opening. This was a problem.
In a slight state of desperation, I went back and started googling more images of the landing gear. This further research led me to find out that Liebherr, the manufacturer of the real gear used on the Embraer jets, is selling a 1:10 model of the E175 landing gear on their website. I couldn't believe it! After some initial hesitation, caused by the price of the model and the weirdness of then having a landing gear in my living room, I decided that it would be worth buying the model because it would be the perfect reference for my digital 3D model. A few days later, this beauty arrived at my doorstep:

From there I measured all the parts and spent a few days remodeling the gear from scratch. And surprise surprise, the gear still didn't retract exactly where it should!
I now knew that the gear was correct, so the problem must have been at the exact position of where the gear hinge is located in the wing. After further and careful examination of my reference pictures, I realized that the axis of gear retraction is not absolutely parallel to the fuselage, but rather sits at a very slight angle. Suddenly everything fit perfectly.

You can see that it took me a few weeks just to get the landing gear right (see pictures of the final model here). Some airplane parts are much easier to get right, but others are even harder and I cannot buy a model of any other part of the plane.
All in all, creating this 10 000-piece LEGO set takes a lot of time.
This is also the reason why I never want to announce an ETA. It is simply impossible to anticipate when you will get things right. The same goes for developing plugins, but that is a story for another time.
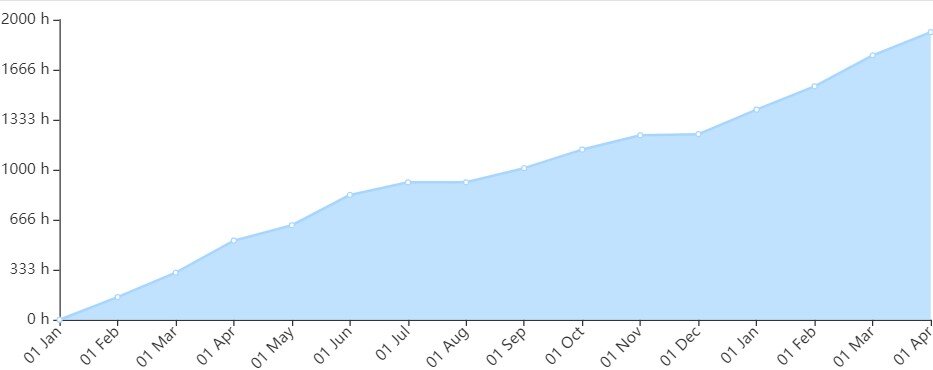
Finally, I’d like to share some data about the E-Jets Family project. Please keep in mind that there are other people working on this project so the data below only applies to my personal progress.
Development Phases:

Overall Personal Progress:
I hope that you now have a better idea of the time required to develop these add-ons and that you will keep that in mind when you’ll be purchasing your next airplane.
But let’s get to what you really came here for. I am proud to share with you the first exclusive preview of the new E-Jets cockpit inside X-Plane.

Please share the video and tag our facebook page or our website!
If that wasn’t enough, I added some more new images of the cockpit to the website, plus I created an interactive cockpit comparison page, where you can see the difference between the old and new E-Jets cockpit. You can find all those here.
I encourage you to look at a VR picture of the real cockpit and try to find some differences! ;)
That’s all for today! Please do let me know what you think! The main reason of these posts is to bridge the gap between us and our customers as much as possible so please do not hesitate to reply directly to this email!
All the best,
Marko Mamula | X-Crafts Director
Btw, I now love the fact that I have a landing gear in my living room.